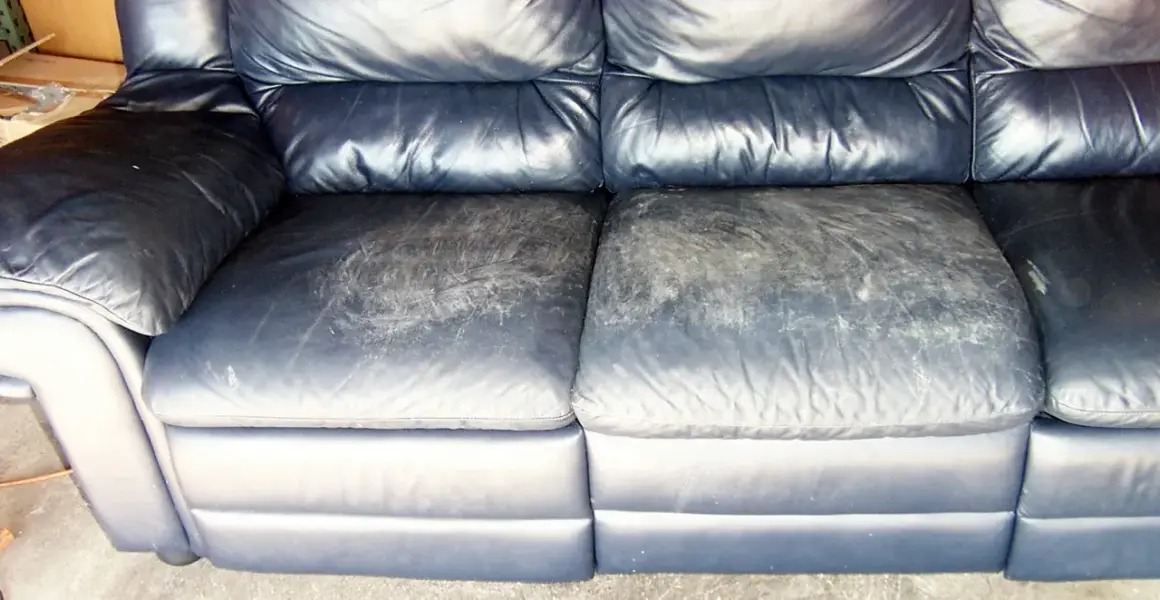
A tired leather couch is usually recoverable long before it needs reupholstering. The real work is figuring out whether you are dealing with dirt, dryness, surface scratches, color loss, or actual structural damage, because each problem calls for a different product and a different level of effort. I walk through the safest restoration sequence below, along with the products, timing, and warning signs that help you avoid making the leather look worse.
The safest restoration path is to match the fix to the damage, not force one product onto every couch
- Identify the leather finish first so you do not use the wrong cleaner or conditioner.
- Start with gentle cleaning because dust and grit can turn a small repair into a larger scratch.
- Use repair filler or a kit only for true cracks, tears, and missing finish, not for every scuff.
- Color restorer works best when the leather is already structurally sound and only the finish looks tired.
- DIY restoration usually stays in the $20 to $100 range, while professional repair often starts around $150 and can climb well above $500 for larger jobs.
- Good maintenance matters because restored leather can slip back fast if it sits in direct sun or dries out again.
Start by identifying the leather finish
The first mistake I see is treating every sofa like it has the same finish. That is risky, because protected leather, aniline leather, nubuck, suede, and faux leather each respond differently to moisture, conditioners, and color products. If you can find the manufacturer tag or care sheet, use that first. If not, look closely at the surface: smooth and uniform usually means protected leather, while a soft, velvety nap usually means nubuck or suede.
| Leather type | What it usually looks like | Safer approach | What I would avoid |
|---|---|---|---|
| Protected or pigmented leather | Smooth, fairly even color, often the easiest to wipe clean | Mild leather cleaner, microfiber cloths, light conditioning, repair kits for surface damage | Abrasive scrubbing, soaking the surface, heavy oil-based home remedies |
| Aniline leather | Natural markings, softer feel, color that can look more varied | Dry dusting and very gentle cleaning with a product approved for aniline leather | Saddle soap, harsh cleaners, abrasive pads, strong oils |
| Semi-aniline leather | Natural-looking but slightly more protected than full aniline | Gentle cleaner, careful spot treatment, light conditioning if the maker allows it | Over-wetting, aggressive degreasers, product stacking |
| Nubuck or suede | Velvety nap that changes shade when brushed | Specialized nubuck or suede cleaner, soft brush, protective spray made for that finish | Regular leather conditioner, soaking, creams that flatten the nap |
| Bonded or faux leather | Can look smooth at first, but often peels in sheets as it ages | Products made for synthetic upholstery, plus realistic expectations about repair | Assuming standard leather filler will solve a coating failure |
If you are unsure, do a tiny hidden-area test and wait for the result to fully dry. I would rather discover a bad reaction on the back of a cushion than on the front rail. Once the finish is identified, choosing products becomes much more predictable, which is where I go next.
Choose products that match the damage
I keep the product list simple on purpose. You do not need a shelf full of specialty bottles to restore a leather sofa, but you do need the right categories of products and nothing overly aggressive. A pH-balanced cleaner is the safest starting point for finished leather, and I prefer one that is designed for upholstery rather than bags or shoes. For deeper wear, the rest of the kit depends on whether you are cleaning, conditioning, filling, recoloring, or sealing.
| Product | What it does | Typical U.S. budget | Best use |
|---|---|---|---|
| Microfiber cloths and a soft brush | Lifts dust and surface grime without scratching | $5 to $20 | Every restoration, even the small ones |
| pH-balanced leather cleaner | Removes dirt and body oils safely | $10 to $25 | Finished leather that is dirty, dull, or sticky |
| Leather conditioner | Replaces some softness and helps dry leather feel less brittle | $15 to $40 | Protected leather that looks dry or slightly faded |
| Leather repair filler or compound | Builds up shallow cracks, gouges, and worn edges | $15 to $35 | Small cracks, thin spots, and light tears |
| Leather adhesive or patch kit | Supports small tears from the back side or reinforces weak spots | $15 to $50 | Separated seams, splits, and small punctures |
| Color restorer, recoloring balm, or leather dye | Refreshes faded color and blends worn areas | $20 to $60 | Surface fading, color mismatch, and dull finish |
| Sealer or protective top coat | Helps lock in color and improve wear resistance | $15 to $35 | After filler, dye, or color restoration |
There are a few products I would skip unless a manufacturer specifically recommends them: olive oil, heavy furniture polish, bleach, magic-eraser style abrasive pads, and vinegar on delicate leather. They can make the couch look temporarily better while creating residue, dryness, or finish damage that is harder to fix later. Once the toolkit is sorted, the actual restoration work can begin.
Clean the surface before you touch the finish
Cleaning sounds basic, but it sets the quality of everything that follows. If dust and grit stay on the leather, you can drag them across the surface while you work and create new scratches. I always clean in small sections and let the leather dry fully before deciding whether it needs conditioner or a repair product.
- Vacuum the couch with a soft brush attachment, especially along seams, under cushions, and around the frame edge.
- Wipe the surface with a dry microfiber cloth to remove loose dust before any liquid goes near it.
- Test your cleaner on a hidden area and let it dry completely before moving on.
- Apply the cleaner to the cloth, not directly to the leather, unless the product label says otherwise.
- Work in small sections with light pressure. The goal is to lift grime, not scrub the finish.
- Dry each area with a clean cloth and let the couch air-dry for at least 30 to 60 minutes before the next step.
If the surface looks clean while still damp and then the stain returns as it dries, that is often wicking, which means soil from deeper in the finish is coming back up. In that case, a second gentle cleaning pass may help, but repeated soaking usually makes the problem worse. When the couch is clean and dry, the real damage becomes much easier to judge, and that is where repair work starts.
Repair scratches, cracks, and small tears
This is the stage where I get most selective. Not every mark needs filler, and not every crack needs a full repair kit. The more precisely you match the method to the problem, the more natural the result will look.
Light scratches and scuffs
For shallow marks that do not feel deep when you run a finger across them, a leather conditioner or a small amount of recoloring balm may be enough. I usually buff gently with a microfiber cloth after application, then let the area settle before judging the result. On protected leather, a scuff often blends better after the surface has been cleaned and conditioned than after any heavy-handed repair.
Cracks and dry spots
When leather feels dry, tight, or slightly flaky, conditioner is helpful but may not be enough on its own. If the crack has actual depth, use a flexible leather filler in thin layers so it does not harden into an obvious patch. I would rather build slowly and keep the finish thin than force one thick application that looks plastic. After the filler cures, many kits call for a light sanding and then recoloring over the repaired area.
Read Also: Sofa Styles - Choose the Right Couch for Your Home
Small tears and lifted seams
For a small tear, a backing patch and leather adhesive can stabilize the area from behind before you smooth the top layer. That matters because surface color work alone will not hold if the leather is still splitting. If the tear is at a seam, the foam is showing, or the leather feels brittle around the damage, I would be cautious about DIY. Those are the cases where a visible repair may still fail later if the underlying stress is not addressed.
A practical rule: if the damage is only in the finish, start gently; if the leather has lost material or split open, build support first and color second. That sequence keeps the repair believable rather than cosmetic-only.
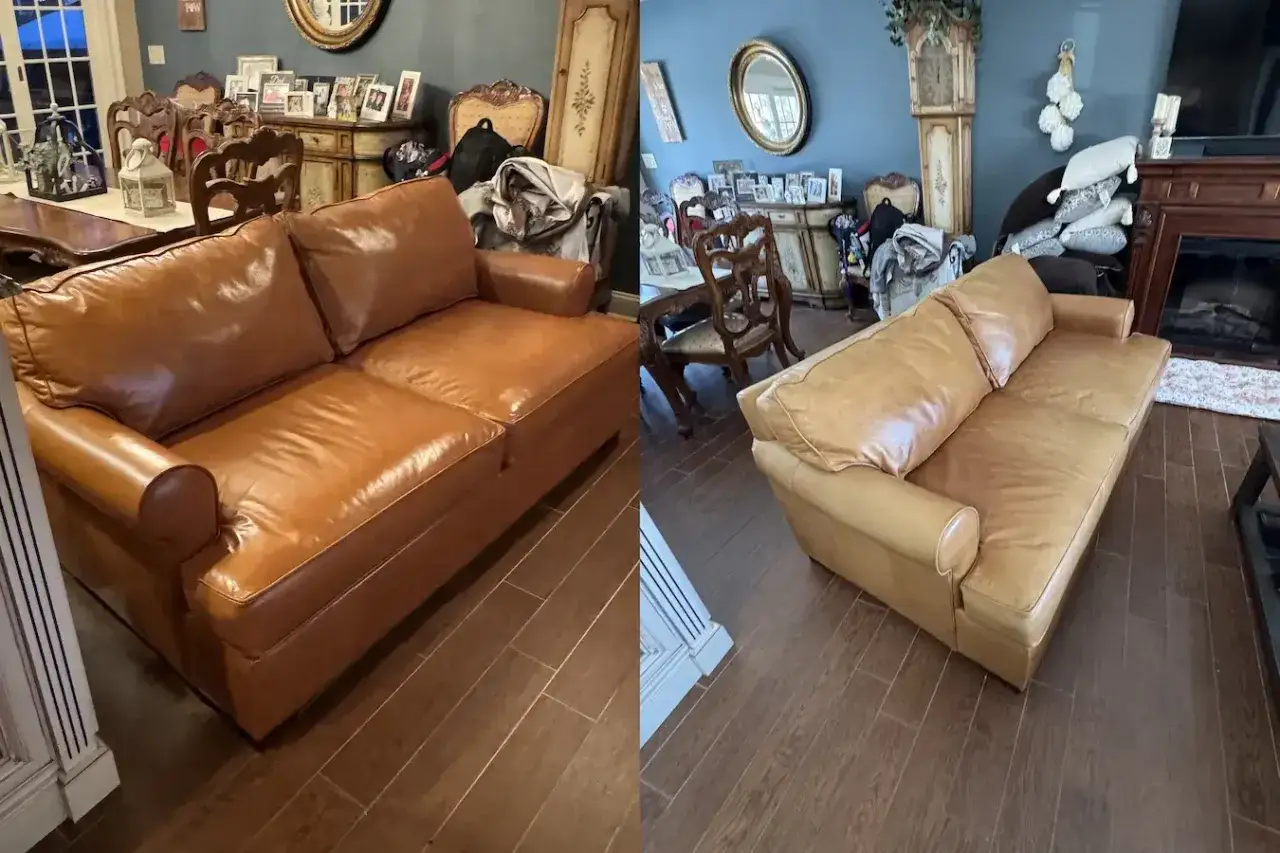
Bring back faded color without making it look painted
Color restoration is where a lot of good DIY work goes sideways. People often apply too much product at once and end up with an even, but obviously artificial, finish. The trick is to use the lightest method that can still solve the problem.
| Problem | Best product choice | What to expect |
|---|---|---|
| Surface fading or dull patches | Recoloring balm or color restorer | Best when the leather is still intact and only the color looks tired |
| Noticeable wear on high-contact areas | Leather dye or restoration coating | Often needs several thin coats and careful color matching |
| Peeling or flaking finish | Repair coating plus filler, or professional help | Usually indicates the top layer has failed, not just the color |
My process is simple: test in a hidden place, match the color in daylight, and apply thin coats with patience. Most products work better with two or three light passes than one heavy coat, and each pass should dry fully before the next one goes on. As a rule of thumb, give the area at least 30 to 60 minutes between coats and 24 hours before heavy use, unless the product label says otherwise. If the leather is badly sun-faded, expect some difference between the repaired section and the untouched areas nearby, because old leather has already aged unevenly.
Color work is most convincing when the leather still has structure beneath it. That is why I treat it as the final cosmetic step, not the first fix.
Know when restoration should stop
Not every worn couch deserves the same investment. If the frame is solid and the leather damage is mainly cosmetic, restoration is often the smarter move. If the cushions are collapsed, the frame wobbles, and the leather is failing in several places, surface repair can become a frustrating way to delay replacement.
| Situation | Typical U.S. cost | Best move | Why |
|---|---|---|---|
| Light dirt, dryness, minor scuffs | $20 to $60 | DIY cleaning and conditioning | Fast, low-risk, and usually enough |
| Small scratches, fading, and shallow wear | $30 to $100 | DIY repair kit or color restorer | Good value if the leather is otherwise healthy |
| Cracks, tears, and section-by-section color loss | $150 to $600+ | Professional repair | Color matching, filler work, and durability matter more here |
| Large peeling areas, collapsed cushions, or frame issues | $500 to $1,200+ for more involved work | Professional reupholstery or replacement | Cosmetic repair will not solve structural failure |
For most households, I would keep the couch when the frame is sturdy, the cushions still support well, and the leather damage is concentrated on the surface. I would stop DIY when the repair starts chasing the same problem in multiple places, because that is usually a sign the sofa needs a different kind of investment.
The care rhythm I trust for most restored leather sofas
Once the sofa looks better, the job is really about keeping it from drifting back to where it started. I like a simple rhythm because it is easier to stick to and less likely to damage the finish.
- Dust or vacuum weekly, especially along seams and under cushions.
- Wipe the surface with a dry or barely damp microfiber cloth when it starts to look dull.
- Condition protected leather every 6 to 12 months, depending on use and the manufacturer’s guidance.
- Keep the sofa out of direct sunlight and away from strong heat sources, which dry and fade leather faster.
- Blot spills immediately instead of rubbing them across the surface.
- Use a throw or pet cover in the spots that get the most wear, if claws, denim dye, or kids are part of the story.
If I had to reduce the whole process to one principle, it would be this: use the least aggressive fix that solves the actual problem. Clean first, repair only what is truly damaged, recolor only where the finish has failed, and protect the leather before daily wear starts winning again. That approach usually gives the best-looking couch and the fewest regrets.