Removing popcorn ceiling is really a dust-control job disguised as a cosmetic upgrade. I’d approach it by checking the material first, then deciding whether to scrape, skim coat, or stop and bring in an asbestos professional. This guide walks through the decision points, the removal process, the costs, and the finishing work that makes the ceiling look intentional instead of newly patched.
What matters before you start
- Test first if the ceiling is old or you do not know whether it contains asbestos.
- DIY works best on small, low-risk, unpainted ceilings with normal height and easy access.
- Typical professional removal in the U.S. often lands around $1 to $6 per square foot, while asbestos abatement is much higher.
- A smooth finish usually takes more time in the sanding, skim-coating, and priming stages than in the scraping itself.
- If the ceiling is badly damaged or heavily painted, covering it with new drywall can be smarter than forcing a scrape.
What you need to know before you scrape a single square foot
A popcorn or acoustic ceiling is a sprayed texture that was originally used to hide drywall flaws and reduce glare. It was common because it was fast and cheap, not because it ages well. In a renovation, the real question is not whether the texture looks dated. It is whether the ceiling is safe to disturb and how much repair work the surface will need after the texture comes off.
The biggest risk is asbestos in older ceiling texture. If the home is older and the finish is original or has never been tested, I treat it as suspect until proven otherwise. Do not dry scrape, sand, or drill it just to see what happens. If testing confirms asbestos, the job stops being a weekend DIY project and becomes a regulated abatement job.
Painted ceilings are a separate challenge. Once the texture has been sealed with paint, water penetrates poorly and the material tends to release in smaller, messier fragments. That does not make removal impossible, but it does make the project slower and more likely to damage the drywall paper underneath. That detail matters because the finish after scraping is usually what determines whether the room looks refreshed or merely stripped.
When DIY makes sense and when to call a pro
I think of popcorn ceiling removal as three different jobs: simple scraping, repair-heavy smoothing, and asbestos work. Only one of those is truly friendly to a confident DIYer. The rest can be done at home, but the risk, mess, and finishing time rise quickly.
| Approach | Typical cost | Best fit | Main tradeoff |
|---|---|---|---|
| DIY scrape and finish | Usually a few hundred dollars in supplies for one room, more if you need tools | Small, low-risk rooms with unpainted texture and no asbestos concern | Very messy and time-consuming |
| Professional removal | About $1 to $6 per square foot for ordinary projects | Most homeowners who want a cleaner finish with less disruption | Higher upfront cost, but far less labor for you |
| Asbestos abatement | Often $5 to $20 per square foot, plus testing | Any ceiling that tests positive for asbestos | Requires trained handling and proper disposal |
If I were deciding whether to do it myself, I would ask four questions. Is the ceiling tested? Is it painted? Is the room easy to protect and ventilate? Do I actually want a smooth finish, or do I just want the texture gone? If the answer to any of those pushes the job toward complexity, a pro usually makes more sense.
There is also a halfway option that people overlook: a skim coat. That means spreading joint compound over the entire ceiling to bury the old texture instead of stripping every bit off. It is slower than it sounds, but it can produce a cleaner result when the existing texture is stubborn or the drywall underneath is already uneven. That leads directly to the situations where scraping is not the best move at all.
If the texture should be covered instead of scraped
Not every ceiling needs to be fully removed. If the surface is heavily painted, the drywall paper is already damaged, or the texture has been patched enough times that it no longer releases cleanly, I would seriously consider covering it instead. A skim coat can flatten a ceiling without tearing up the substrate, and new drywall can reset the whole surface if the structure and ceiling height allow it.
A skim coat is a thin layer of joint compound spread across the ceiling to fill the valleys of the texture. It does not eliminate every imperfection by magic, but it gives you a cleaner base than trying to scrape a surface that fights back. A full drywall overlay is even more decisive, though it lowers the room slightly and adds more material and labor.
- Choose a skim coat when the ceiling is structurally fine but visually rough.
- Choose drywall overlay when the existing ceiling is badly patched, stained, or too uneven to trust.
- Choose simple repainting when the texture is still acceptable and you mainly want a cleaner color.
That choice matters because the best-looking rooms usually come from the least dramatic intervention that still fixes the problem. Once you decide on the method, the actual removal or smoothing process becomes much easier to plan.
The process I trust for a clean, low-drama removal
When the ceiling is safe to disturb, I keep the process slow and controlled. The goal is not to rip material off as fast as possible. The goal is to keep dust down, protect the room, and avoid gouging the drywall underneath.
-
Clear and seal the room. Remove furniture if you can. If not, wrap everything in plastic and tape the seams. Cover floors with thick plastic or rosin paper, then tape the edges so dust cannot slip underneath.
-
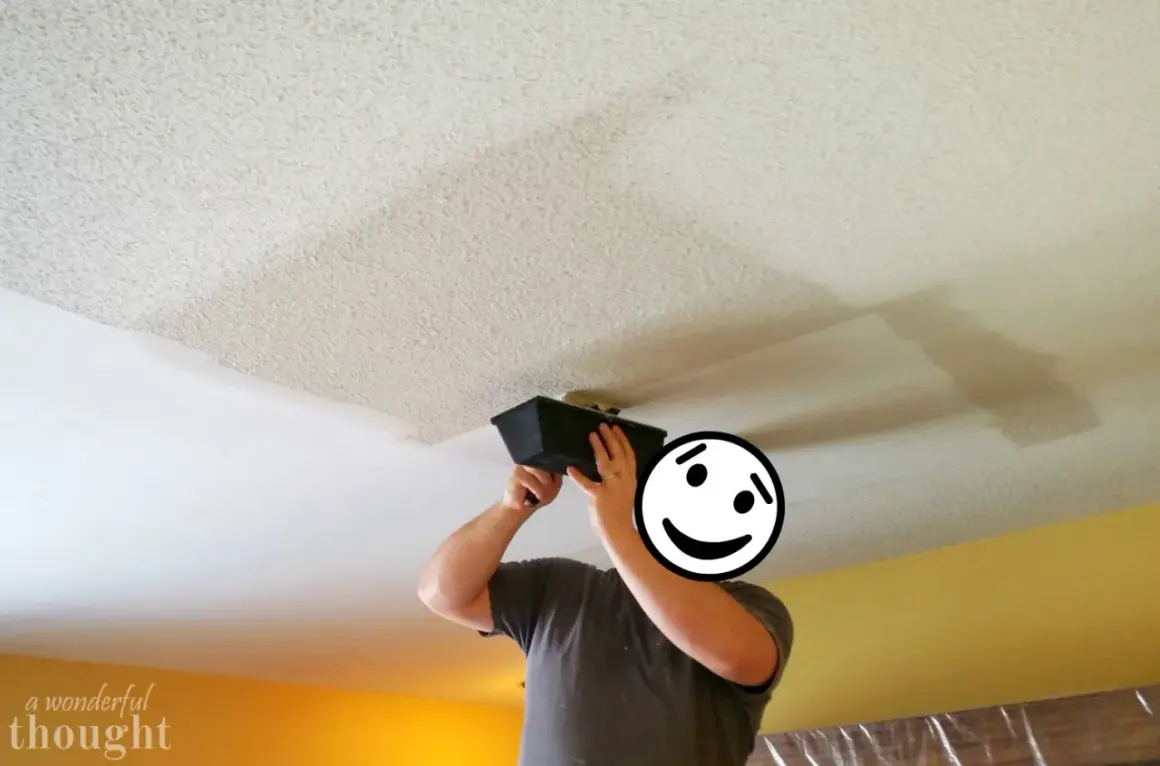
Cut power to the ceiling. Take down light fixtures, fans, and anything else mounted overhead. If you are not comfortable working around electrical boxes, stop here and get help.
-
Wet a small section at a time. Lightly mist the texture and let it soften for a few minutes. Do not flood the ceiling. Too much water can soak drywall and make the paper face peel.
-
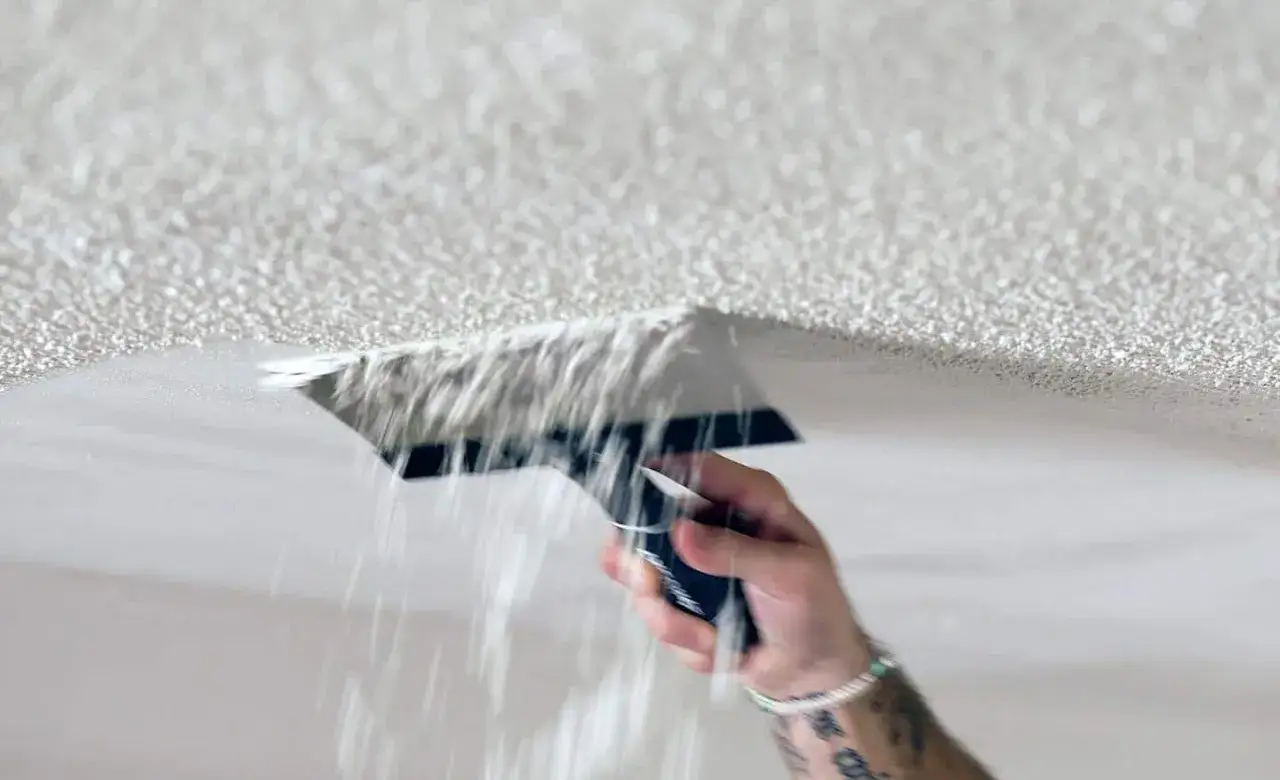
Scrape with a wide knife at a shallow angle. A 6- to 12-inch drywall knife gives you more control than a narrow scraper. Work in short passes. If the ceiling is painted, expect more resistance and smaller flakes.
-
Inspect the surface as you go. If you see torn paper, deep scratches, or seams opening up, slow down and stop scraping harder. Those repairs are manageable, but they are easier to fix before the whole room is damaged.
-
Let the surface dry before smoothing. Once the texture is gone, let the ceiling dry completely, then apply joint compound where needed. After that comes sanding, primer, and paint.
For a typical bedroom, the real time sink is not the scraping itself. It is the dry time between passes, the cleanup, and the finishing. A room can easily turn into a two- or three-day project once you count drying and touch-ups, and longer if the ceiling was painted or previously repaired.
How to finish the ceiling so the room still looks polished
A scraped ceiling is not finished ceiling. If you stop too early, every seam, ridge, and repair line will show the moment the light hits it. The finishing stage is where the room starts to look deliberate again.
Joint compound, often called drywall mud, is what I use to level small imperfections after scraping. A thin coat over the whole ceiling can hide the tiny scars left by the scraper. After it dries, a light sanding with a pole sander evens out the surface. The key is restraint. Heavy sanding creates more dust and can expose the drywall paper underneath.
- Use a drywall primer before paint so the finish coats do not soak in unevenly.
- Choose flat ceiling paint, not satin or semi-gloss, because shine highlights flaws.
- If the ceiling has seams or repaired patches, expect at least one extra skim pass.
- Keep the room lighting low while sanding and priming so imperfections are easier to spot.
I also like to think about the ceiling as part of the room’s overall design, not just a surface to be fixed. A smooth, flat finish can make the room feel taller and calmer, but only if the paint, trim, and lighting are also clean and coherent. Otherwise the new ceiling can expose how uneven the rest of the space really is.
The mistakes that usually turn a simple project into a repair job
Most of the expensive mistakes happen before the first scrape. People either do not protect the room well enough or they attack the texture too aggressively. Both create more work than the original job required.
- Skipping asbestos testing on an older ceiling. That is the mistake with the biggest safety consequences.
- Scraping dry painted texture as if it were unsealed. The result is usually torn drywall paper and more patching.
- Using too much water and soaking the board behind the texture. That leads to swelling, soft spots, and longer dry time.
- Pressing too hard with the scraper. The texture should come off; the drywall face should stay intact.
- Underestimating cleanup. Fine dust gets into vents, door tracks, and light fixtures if you do not seal the room carefully.
- Ignoring water stains or cracks. If the ceiling was damaged before, fix the source problem first or the repair will fail later.
If I had to pick one habit that prevents the most damage, it would be patience. Small sections, controlled wetting, and light pressure do more for the final result than trying to force the whole room in one afternoon. That patience pays off even more once you see what the finished ceiling does to the room itself.
Why the ceiling change affects the whole room
Once the texture is gone, the room usually reads differently. Light moves more cleanly across the ceiling. Pendant fixtures look sharper. Crown molding, wall color, and furniture lines suddenly matter more because the ceiling is no longer visually noisy. That is one reason I think this project belongs in the same conversation as flooring or trim updates, not just patch-and-paint maintenance.
A smooth ceiling can also change how decorative choices feel. In a bedroom, it can make bedding and wall art look more tailored. In a living room, it can make a statement fixture look more intentional instead of competing with a busy surface overhead. The tradeoff is that everything else has to hold up better, because a flat ceiling does not hide sloppy cut lines or mismatched paint the way a textured one does.
If you want the room to feel genuinely refreshed, I would plan the ceiling, lighting, and paint together rather than treating each as a separate weekend job. The ceiling is the biggest uninterrupted surface in the room, and once it is clean, the rest of the design has to carry itself a little more honestly.