The fastest route to a clean ceiling finish
- Use flat or ultra-flat ceiling paint unless you have a specific reason to choose something shinier.
- Paint the ceiling before the walls so drips do not ruin fresh wall color.
- Cut in the edges first, then roll the main surface while the border is still wet.
- Choose a 3/8-inch nap for smooth drywall and 1/2-inch to 3/4-inch for texture.
- A basic DIY room often lands around $60 to $150 in materials, more if the ceiling needs repair or primer.
Choose the right paint and tools for the ceiling you have
I usually start with the ceiling paint itself, because sheen matters more overhead than most people expect. A flat or ultra-flat finish hides roller texture, softens small flaws, and keeps light from bouncing around in a way that makes every patch look louder than it is. If the ceiling has smoke stains, water marks, or visible repairs, I reach for a stain-blocking primer first so the old problems do not bleed through the new coat.
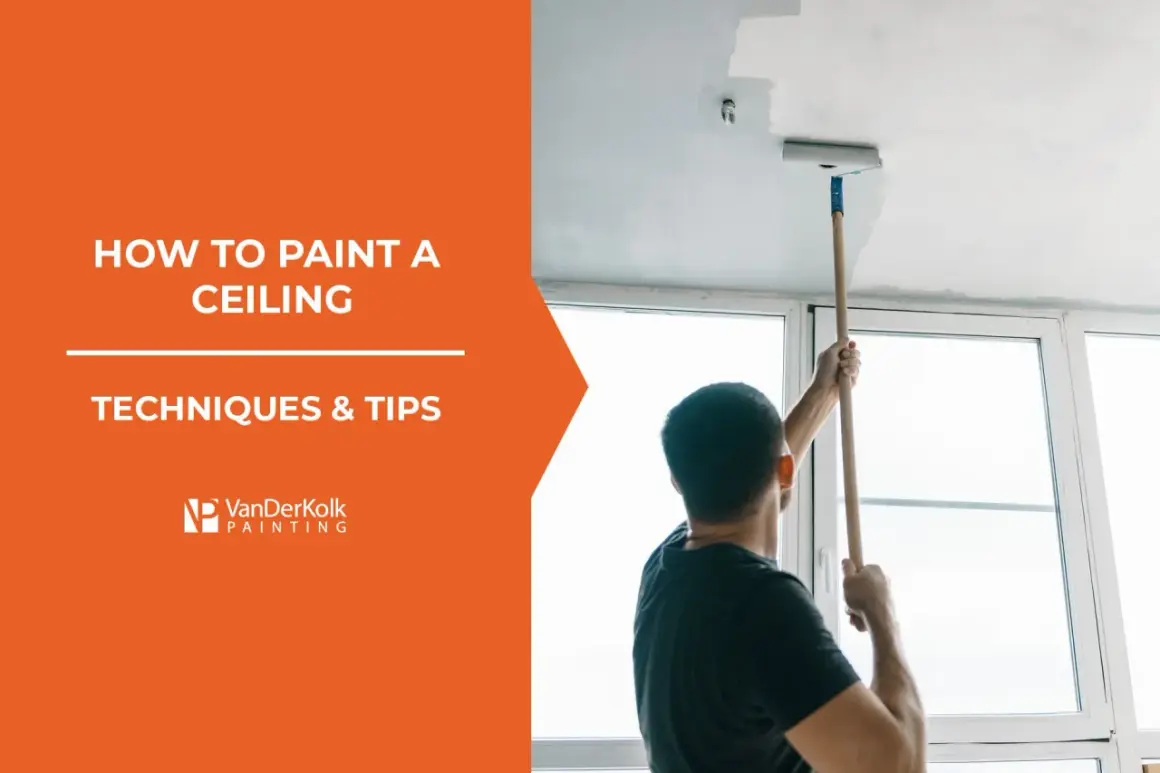
For a smooth, ordinary drywall ceiling, a 9-inch roller with a 3/8-inch nap is the sweet spot. If the ceiling has light texture, move up to 1/2-inch; for heavier texture, 3/4-inch can help the paint reach the low spots without crushing the surface. An angled 2 1/2-inch brush handles the edges cleanly, and an extension pole is not optional in my book unless the room is tiny.
| What I use | Best for | Why it matters |
|---|---|---|
| Flat or ultra-flat ceiling paint | Most bedrooms, living rooms, and hallways | Hides small roller marks and reflects less light. |
| Stain-blocking primer | Water spots, smoke, patches, and repairs | Prevents old marks from showing through the finish. |
| 3/8-inch nap roller | Smooth drywall | Leaves less texture and splatter. |
| 1/2-inch to 3/4-inch nap roller | Lightly textured ceilings | Reaches into texture without flattening it. |
| 2 1/2-inch angled brush | Edges and corners | Makes cutting in easier and cleaner. |
At major U.S. home centers, a gallon of ceiling paint often lands around $30 to $45, while a five-gallon bucket can run roughly $115 to $190 depending on the brand and line. A gallon usually covers about 350 to 400 square feet on smooth drywall, but texture can reduce that by 20% to 30%. For a standard room, I budget extra if I know I will need primer, patching compound, or better drop cloths.
Once the tools are set, the real work is making sure the room is ready for paint instead of ready for cleanup. That prep stage is where a good ceiling job is won.
Prep the room so the finish stays on the ceiling
I treat prep as part of the paint job, not as a chore to rush through. If the room is crowded, I move furniture out when possible or pull everything to the center and cover it with plastic and a canvas drop cloth. Canvas is better underfoot because it stays put and absorbs drips; plastic alone is too slippery for a room where you will be moving ladders and poles.
- Remove or cover furniture, then protect the floor with a drop cloth.
- Scrape loose paint, fill nail holes, and caulk small gaps only where needed.
- Sand patches smooth and vacuum the dust from the ceiling and trim.
- Wash off grease, smoke residue, or grime, then let the surface dry fully.
- Spot-prime stains, repairs, and repaired seams before the ceiling coat.
If the home was built before 1978, I would not sand or scrape without thinking about lead safety. EPA guidance is clear that paint-disturbing renovation in pre-1978 homes can create dangerous dust, and paid work in those homes has lead-safe requirements. For a DIY project, the practical move is simple: test or assume lead may be present, then use dust-control habits instead of treating it like ordinary prep.
One more small detail matters here: turn off ceiling fans and set up your lighting so you can see the surface from different angles. Ceiling flaws often disappear from one spot in the room and show up from another, so good light catches problems early. With the room prepared, the painting sequence itself becomes much easier to control.

Apply the paint in a sequence that avoids lap marks
Cut in the perimeter first
I start by painting a 2- to 3-inch strip around the edge where the ceiling meets the walls. An angled brush gives me the cleanest line here, and I work one section at a time so the border stays wet when the roller reaches it. The point is not to make the edge perfect with the brush; it is to create a fresh band that the roller can blend into without a visible seam.
Roll the main field in overlapping passes
Once the edge is set, I switch to the roller and work in a manageable section, usually about 3 to 4 feet wide. I load the roller evenly, but not heavily, and apply the paint with light pressure. The roller should be doing the work, not my shoulders. Overlapping passes matter more than speed here, because they even out the film and reduce the striping that overhead light loves to expose.
For the final passes, I like to keep my strokes consistent in one direction and avoid stopping in the middle of the room. If I have to pause, I do it at a natural break rather than trying to carry a half-dry edge across a fresh section. That is how lap marks are born.
Read Also: How Many Can Lights Per Room? Your Guide to Perfect Lighting
Plan on a second coat if the room needs it
Most ceiling paints are ready for recoating in about 2 to 4 hours, but the can label wins every time. If I am covering a bold color, patching repairs, or dealing with a stained surface, I expect two coats. One coat can look fine while wet and still dry patchy once the sheen evens out, especially in side light.
The method is simple, but ceilings are unforgiving when the surface is textured, stained, or high enough to make you fight the angle. That is where a few adjustments save a lot of frustration.
Adjust the method for texture, stains, and tall rooms
| Ceiling type | My adjustment | What to watch for |
|---|---|---|
| Smooth drywall | 3/8-inch nap, light pressure, normal coverage | Too much paint creates visible roller texture. |
| Light texture | 1/2-inch nap and a little more paint in the roller | Pressing too hard can flatten the texture unevenly. |
| Popcorn or heavier texture | 1/2-inch to 3/4-inch nap; consider spraying large areas | Overworking the surface can loosen material. |
| Water stain or patch | Prime first, then paint | Paint alone often flashes through the repair. |
| Tall ceiling | Use an extension pole and smaller sections | Fatigue leads to uneven passes and missed spots. |
If a stain keeps showing after primer, I assume I am dealing with a moisture issue, not just a cosmetic one. That matters because paint can hide a mark, but it cannot fix a leak. In bathrooms and kitchens, I still like a flat ceiling finish, but I want the room ventilated and the substrate fully dry before I start.
For ceilings higher than 9 feet, I prefer an extension pole over a ladder for the main field whenever possible. It keeps the roller angle steadier, which makes the finish look less broken up. If the room is large, I also work in smaller sections so I can keep the overlap consistent from one pass to the next. Once the paint is on, the next challenge is correcting the mistakes that show up immediately.
Fix the common failures before they dry into the room
- Drips - Catch them immediately with a dry brush or a nearly unloaded roller before they set.
- Roller lint - Pull loose fibers off a new cover with painter’s tape before it touches the ceiling.
- Streaks or lap marks - Rework the section while it is still wet; once it skins over, a second coat is usually the real fix.
- Flashing - Prime patched spots and keep the pressure even so repairs do not read as shiny blocks.
- Missed edges around vents or fixtures - Touch them up after the main surface has dried, using a small brush and steady light.
I also check the room in two lighting conditions if I can: daylight and artificial light. Ceilings can look fine in one and patchy in the other, especially if the room has strong side light from windows. That final inspection is where I catch the areas that would otherwise bother me every time I walk in.
What makes a ceiling feel intentionally finished
The best ceilings are the ones that support the room without calling attention to themselves. I usually get that result by keeping the line crisp at the wall, removing tape before the paint fully hardens, and choosing a sheen that does not fight the light in the room. In a bright space, ultra-flat is often the most forgiving choice; it softens shadows and keeps the surface calm. In a darker room, a clean white ceiling can help the space feel taller without turning the room into a showroom.
If I were doing the job again from scratch, the two things I would protect most carefully are the wet edge and the prep quality. Those are the parts that make the ceiling look deliberate instead of merely painted. If the surface has active cracking, a leak, or a failing texture, I stop there and fix the cause first, because no finish coat can compensate for a moving problem underneath.