Painting a room is one of the fastest ways to change how a home feels, but the result depends on having the right materials before the first roller hits the wall. I usually break the job into three parts: prep, application, and cleanup, because each one needs a slightly different set of supplies. If you are figuring out what you need to paint a room, this guide covers the essentials, how to choose paint and primer, how much to buy, and where it makes sense to spend a little more.
The core kit is smaller than most people think
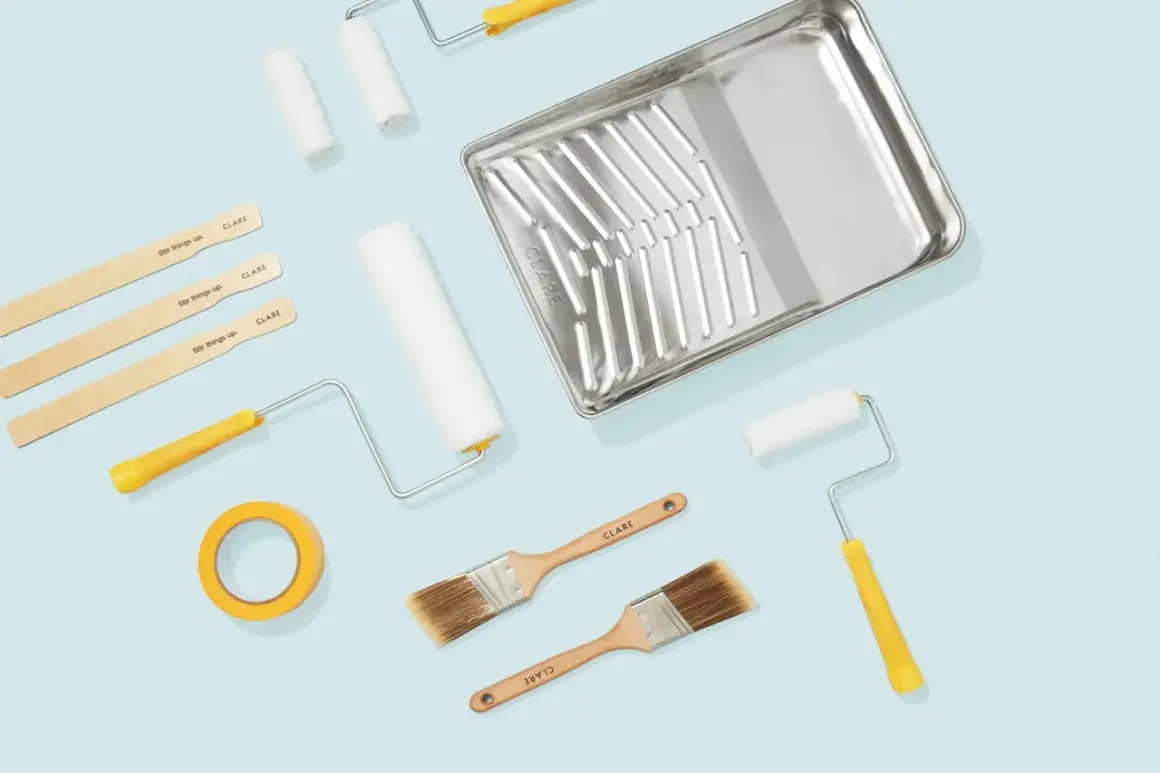
- Start with interior paint, primer only when the wall needs it, painter’s tape, drop cloths, a good angled brush, a roller frame, roller covers, and a tray or bucket grid.
- Add patching supplies, sanding sponges, caulk, microfiber cloths, and a screwdriver so you can fix the wall before you paint it.
- For most U.S. rooms, eggshell or satin is the safest wall finish; flat works best on ceilings and semi-gloss is better for trim.
- A 10-by-12-foot room with 8-foot ceilings usually needs about 1 gallon per coat on the walls, but two coats means you should plan on 2 gallons.
- A basic DIY room kit often costs $75-$200 before paint and $125-$350 after paint and primer are added.

The supplies that belong in every room-painting kit
When I shop for a standard bedroom or living room, I keep the list tight. You do not need a pile of specialty gadgets; you need the tools that help the paint go on evenly and the room stay clean while you work.
| Item | Why it matters | My usual buy |
|---|---|---|
| Interior wall paint | This is the finish you will see every day, so the sheen and quality matter. | Usually 2 gallons for a standard bedroom if I want two solid coats. |
| Primer | Helps with stains, patched areas, raw drywall, and big color changes. | 1 gallon if the wall needs full priming; otherwise just spot-prime repairs. |
| Painter’s tape | Keeps trim, ceilings, and hardware cleaner while you cut in. | 1 roll for a simple room, 2 rolls if there is a lot of trim. |
| Drop cloths | Protects floors and furniture from splatter, drips, and roller marks. | At least 1 canvas drop cloth for the floor plus plastic for furniture. |
| Angled sash brush | The best tool for cutting in around ceilings, corners, trim, and outlets. | One 2-inch or 2.5-inch brush. |
| Roller frame and covers | Used for the main wall area, where most of the coverage happens. | One 9-inch frame and 2-3 covers. |
| Tray or bucket grid | Makes loading the roller easier and keeps the paint coat more even. | One tray with liners or one bucket with a grid. |
| Extension pole | Helps you reach higher walls and keeps the roller pressure more consistent. | One adjustable pole if the room has standard or tall walls. |
| Spackle and putty knife | Fills nail holes, dents, and small dings before paint makes them obvious. | One small tub of spackle and one 1.5- to 6-inch putty knife. |
| Sanding sponge | Smooths repairs and knocks down rough edges after patching. | One pack, usually 120- to 220-grit. |
| Paintable caulk | Seals gaps where trim meets walls and gives the room a cleaner line. | One tube plus a caulk gun if you do not already own one. |
| Microfiber cloths and trash bags | Handles dust, cleanup, and the small messes that slow a project down. | A few cloths, a box of rags, and several heavy-duty bags. |
I rarely buy a sprayer for one ordinary room, and I almost never recommend one to a first-time DIYer. A good brush, solid roller covers, and enough drop cloth coverage do more for the final result than a fancy gadget you will spend half the day masking for.
Once the core kit is clear, the next decision is the finish itself, because sheen affects both appearance and durability. That choice changes not just how the room looks, but also how forgiving the surface will be when the walls get touched, scrubbed, or exposed to humidity.
Choose paint and primer based on how the room lives
Most interior wall paint in the U.S. is latex or acrylic-latex, and that is usually the right choice for a room. It dries faster, cleans up with water, and is easier to live with than old-school oil-based paint for normal interior walls.
| Finish | Best for | Why I like it | Tradeoff |
|---|---|---|---|
| Flat or matte | Ceilings and low-traffic rooms | Hides small surface flaws and gives a soft look. | Marks more easily and is harder to clean. |
| Eggshell | Most bedrooms and living rooms | Offers a good balance of warmth, washability, and a low sheen. | Still shows some wall flaws under strong light. |
| Satin | Hallways, kids’ rooms, and busier spaces | More durable and easier to wipe down than eggshell. | Shine makes dents and patches a bit more visible. |
| Semi-gloss | Trim, doors, and baseboards | Stands up well to cleaning and repeated contact. | Highlights every surface imperfection. |
Primer is not mandatory every time, but I use it whenever the wall condition says to. Fresh drywall, repaired spots, stains, nicotine, smoke, water marks, and dramatic color changes all benefit from primer. If the new color is close to the old one and the wall is clean and intact, a quality paint-and-primer product may be enough, but I still spot-prime repairs so they do not flash through the finish.
Color samples are worth the money too. I like to paint at least two large test patches, about 2 feet by 2 feet, because daylight and artificial light can make the same color look warmer, cooler, or flatter than it did in the store. Once the finish is settled, the real make-or-break step becomes prep, and that is where most room projects succeed or fail.
Prep materials that prevent rough edges and patchy walls
Surface prep is the part people want to rush, and it is also the part that changes the result the most. If you can feel a defect with your fingertips, the paint will not magically hide it.
- Mild cleaner or degreaser for removing dust, fingerprints, and kitchen residue.
- Spackle or lightweight patch compound for nail holes, dents, and small cracks.
- Putty knives in more than one size so you can patch and smooth without fighting the wall.
- Sanding sponges in the 120- to 220-grit range for blending repairs into the surrounding paint.
- Paintable caulk and a caulk gun for the seams where trim meets wall surfaces.
- Microfiber cloths or tack cloths for dust removal after sanding.
- Plastic sheeting or masking film if furniture has to stay in the room.
- Screwdriver for outlet and switch plates.
- Vacuum or shop vac if the room has a lot of sanding dust, baseboard grit, or older texture.
I use spackle for holes and caulk for seams. Mixing those up is one of the fastest ways to get a finished wall that still looks a little off after the second coat. In older homes, I also pay attention to dusty trim, hairline cracks, and uneven plaster, because those issues show up more clearly after fresh paint goes on.
For kitchens or bathrooms, a stronger cleaner matters more than in a bedroom because grease and humidity interfere with adhesion. For a nursery or living room, simple dust removal may be enough. The point is not to overcomplicate prep; it is to match the prep materials to the wall you actually have. From there, the next question is quantity, because buying too little is just as annoying as buying too much.
Buy enough paint without overbuying the project
The fastest way to estimate paint is simple: multiply the length of each wall by the height, add the walls together, then subtract large doors and windows if needed. As a rule of thumb, a gallon of interior paint usually covers about 350-400 square feet on smooth walls, while primer usually covers about 200-300 square feet per gallon.
| Room example | Approximate wall area | What I would buy | Why |
|---|---|---|---|
| 10x10 bedroom with 8-foot walls | About 320 square feet before openings | 2 gallons of wall paint for two coats | One gallon may cover a single coat, but two coats usually need more. |
| 10x12 bedroom with 8-foot walls | About 352 square feet before openings | 2 gallons of wall paint, plus primer if changing color | That size room is right on the edge of one-gallon coverage per coat. |
| Living room with 9-foot walls | Usually 450 square feet or more | 2-3 gallons, sometimes more | Higher ceilings and more wall area increase the total quickly. |
| Room with dark walls going light | Same wall size, more coverage demand | Primer plus extra paint | Coverage and color correction usually take more material. |
If you are buying multiple gallons, I like to have them mixed or boxed together so the color stays consistent from can to can. I also keep an extra quart whenever possible, especially if the room is a custom color or has a lot of future touch-up risk. A little leftover paint is useful; running out halfway through a wall is not.
That is also where ceiling and trim decisions matter. If you are painting the ceiling, you may need a separate flat ceiling paint. If you are repainting trim, buy trim enamel or semi-gloss instead of using the wall paint everywhere. Once you know the quantity, the last variable is budget and where the money actually goes.
Spend more on the parts that affect the finish
A room-painting budget can stay fairly reasonable if you focus on the essentials. In most U.S. stores, the tools and prep materials for a normal room usually land in a fairly narrow range, while paint quality is what pushes the total up or down.
| Item | Typical U.S. cost | Worth spending on? | My take |
|---|---|---|---|
| Painter’s tape | $5-$15 | Yes, but only what you need | Good tape helps, but over-taping wastes time and money. |
| Drop cloths | $10-$35 | Yes | Canvas is usually worth it for floors; plastic is fine for furniture. |
| Angled brush | $8-$25 | Absolutely | A good brush cuts clean lines and sheds less. |
| Roller frame and covers | $10-$30 | Yes | Better roller covers load more evenly and leave fewer lap marks. |
| Tray or bucket grid plus liners | $8-$25 | Yes | Small cost, real convenience. |
| Spackle, caulk, sanding supplies | $15-$40 total | Yes | Prep materials are cheap compared with repainting a bad wall. |
| Primer | $20-$50 per gallon | When needed | Only skip it when the wall condition truly allows it. |
| Interior paint | $25-$80 per gallon | Yes | This is where quality really shows up in coverage and cleanup. |
| Step ladder or stool | $25-$80 | If you do not own one | Safer and faster than balancing on furniture. |
For a simple room, I would expect a basic DIY kit to cost about $75-$200 before paint, then roughly $125-$350 once paint and primer are included. Premium designer lines, stain-blocking primers, or replacing old tools can push the total higher. If I had to cut cost somewhere, I would cut the gimmicks first, not the brush or the roller covers.
- Spend extra on the brush and roller covers if you want a cleaner finish.
- Save money by skipping paint edgers, sprayers, and other tools you will only use once.
- Do not buy the cheapest brush on the shelf if it sheds bristles.
- Do not buy more tape than the room actually needs.
With the budget in mind, I can reduce the whole job to a shopping list that works for an ordinary bedroom and still leaves room for the small problems that tend to show up once the room is empty. That is the simplest way to shop without forgetting the details that matter.
The shopping list I would use for a standard bedroom
| Item | Standard room quantity | When to add more |
|---|---|---|
| Wall paint | 2 gallons | Large rooms, bold color changes, or extra coats |
| Primer | 1 gallon or spot-priming only | Raw drywall, stains, heavy patching, or dark-to-light changes |
| Painter’s tape | 1 roll | Rooms with a lot of trim or detailed edges |
| Drop cloths | 1 canvas floor cloth and 1 plastic cover for furniture | Big rooms or furniture that cannot be moved out |
| Angled brush | 1 brush | If you want a backup brush for trim or cutting in |
| Roller frame | 1 frame | Only if you want a second frame for faster work |
| Roller covers | 2-3 covers | Textured walls, long projects, or if you want a fresh cover for the final coat |
| Tray or bucket grid | 1 set | Usually not necessary to duplicate |
| Spackle and putty knife | 1 small tub and 1 knife | Older walls with lots of holes or dents |
| Sanding sponges | 1 pack | Many repairs, rough patches, or glossy old paint |
| Paintable caulk and caulk gun | 1 tube and 1 gun | Any trim gaps that need a cleaner line |
| Cleaning supplies | Microfiber cloths, rags, trash bags, mild cleaner | Kitchen walls, dusty rooms, or homes with pets |
If I were shopping for one room from scratch, I would buy the list above, then add one extra roller cover and one extra quart of paint if the color is hard to match or the wall is rough. That small buffer prevents the most annoying problem in a paint job: discovering late in the day that you are one step short of a clean finish. The smartest purchases are usually the boring ones, because a properly prepped wall, the right sheen, and a decent brush do more for the room than any shortcut ever will.