Brass looks effortless in a room, but the surface tells a different story: fingerprints, kitchen grease, humidity, and oxidation all show up fast. Here’s how to clean brass safely without stripping lacquer, wearing through plating, or polishing away a finish you actually wanted to keep. I’ll walk through the checks I use first, the mild clean that solves most problems, and the stronger tarnish-removal methods that make sense only when the metal can handle them.
The safest route is to match the cleaner to the finish
- Start gently. Warm water, mild dish soap, and a microfiber cloth solve most grime before polish is even necessary.
- Check the finish first. Solid brass, brass-plated pieces, lacquered surfaces, and unlacquered brass all need different care.
- Drying matters. Water left on brass invites spots and brings tarnish back faster.
- Use acids briefly. Lemon, vinegar, or similar methods should be short contact treatments, not long soaks.
- Protect delicate pieces. Antique, plated, or peeling finishes are safer with restraint than with aggressive scrubbing.
- Clean on a schedule. A little regular maintenance beats a dramatic rescue job later.
Decide whether you want shine, patina, or just a clean surface
Before I touch a piece, I decide what I want the final look to be. On some cabinet pulls, lamps, and decor objects, a soft patina adds depth and keeps the room from feeling too polished; on newer hardware, a brighter finish can make the whole space look sharper and more deliberate. Finish goals matter more than elbow grease. If the surface is only dusty or greasy, I stop at cleaning. If I want the old glow back, I move from cleaning to polishing.
That choice matters because brass is often either solid, plated, lacquered, or unlacquered. The wrong cleaner can turn a simple refresh into a repair job, so I always sort that out first. Once that is clear, the process gets much simpler.
Identify the finish before you scrub
I use two quick checks. First, I look at the surface itself: lacquered brass usually has a more uniform, sealed look, while unlacquered brass tends to age unevenly and show fingerprints or darker areas more quickly. Second, I use a magnet only as a clue. If the magnet sticks, there is steel or iron underneath, which usually means brass plating. If it does not stick, the piece may be solid brass, but that still does not tell me whether it has a lacquer coat.
| Finish type | How I spot it | Safest care | What I avoid |
|---|---|---|---|
| Solid brass, unlacquered | No magnet pull, natural tarnish, warmer tone that changes with age | Soft cloth, mild soap, and occasional polish if I want more shine | Long acid soaks, abrasive pads, over-polishing |
| Solid brass, lacquered | Even, sealed finish; often sold as low-maintenance hardware or decor | Damp cloth and mild soap only | Metal polish, vinegar, lemon, and abrasive cleaners |
| Brass-plated | Magnet sticks, surface brass looks thinner or more fragile | Very gentle wiping with soap and water | Heavy polishing, scrubbing, acids, soaking |
| Aged or patinated brass | Darker tone, uneven color, often intentional on decorative pieces | Clean the dirt, not the age | Anything that strips the color you want to keep |
If I cannot tell what I have, I start with the mildest method in a hidden spot and watch for dulling, discoloration, or residue. That small pause saves a lot of damage later, and it leads straight into the routine clean that works for most pieces.
A simple clean removes more grime than most people expect
For most pieces, I begin with the least dramatic fix: warm water, a drop or two of dish soap, and a soft cloth. I mix about 1 quart of warm water with 2 or 3 drops of soap; anything stronger usually leaves residue instead of helping. If the piece has grooves, I use a soft toothbrush or cotton swab so I can lift dirt from details instead of grinding it into the surface. On installed hardware, I also place a towel underneath so cleaner does not run onto wood, stone, or paint.
- Dust the piece first so loose grit does not scratch the finish.
- Wipe with the soapy water using a microfiber cloth or soft sponge.
- Rinse the cloth, wring it out well, and wipe again to remove residue.
- Dry immediately with a second clean cloth.
- Buff lightly until the surface feels clean, not slick.
This routine is enough for fingerprints, light kitchen film, and everyday dullness. If the brass still looks flat after that, I move up to tarnish removal rather than scrubbing harder.
Remove tarnish when soap is not enough
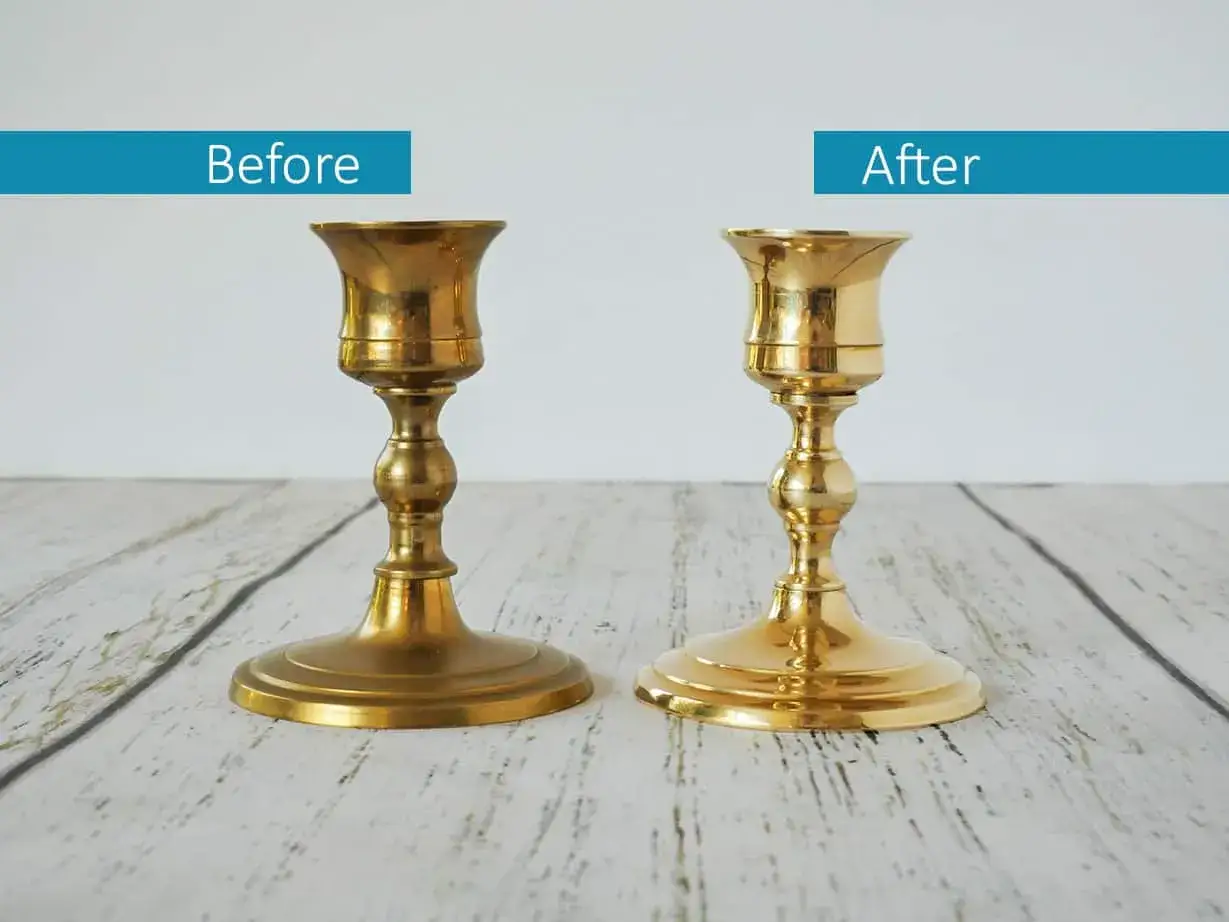
Once I know the brass is solid and unlacquered, I can use a stronger method for visible tarnish. I prefer paste methods over long soaks because they give me more control, especially on small decorative objects and hardware with details. The goal is not to blast the surface back to a fake-new look; it is to lift oxidation without leaving scratches, haze, or uneven spots behind.
| Method | Best for | Typical time | Main caution |
|---|---|---|---|
| Lemon and salt | Light tarnish on solid, unlacquered brass | 1 to 3 minutes of rubbing | Do not let acid sit on the metal |
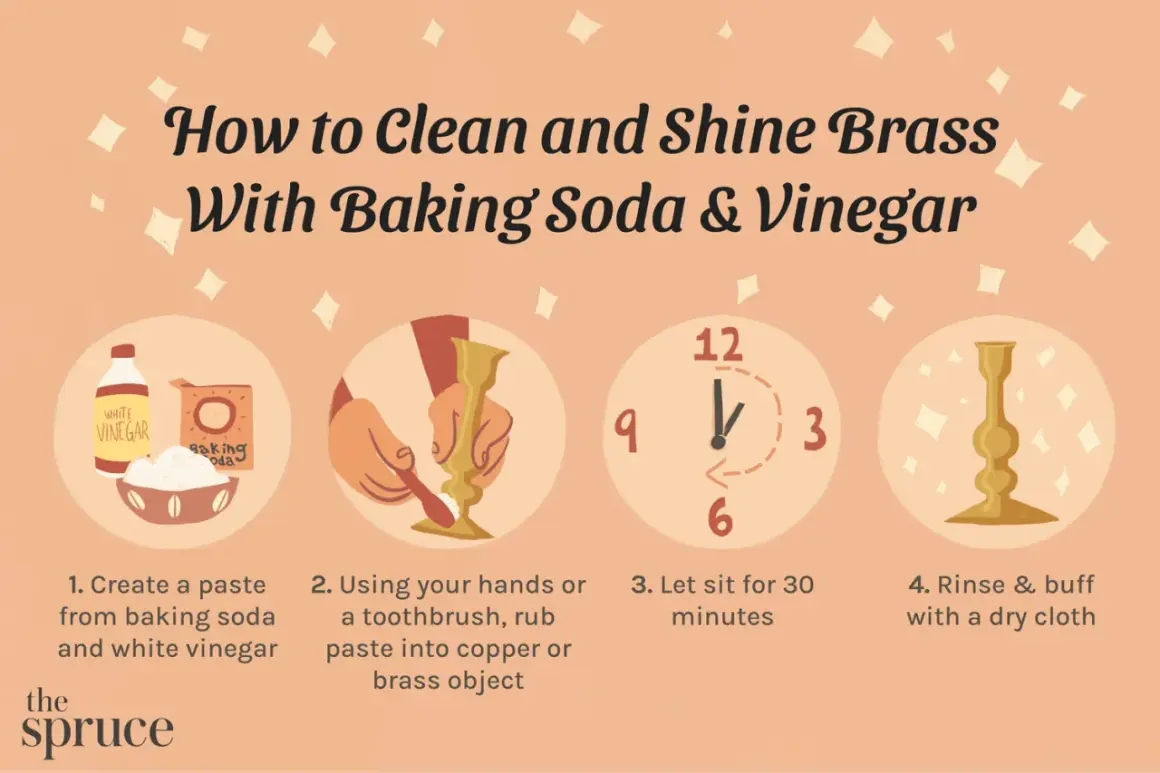
| Baking soda paste | Moderate tarnish and detailed surfaces | 5 to 10 minutes total | Rinse well so residue does not linger |
| Commercial brass polish | Heavier tarnish on sound metal | 5 to 15 minutes | Test a hidden area first and ventilate the room |
| Vinegar and salt paste | Small stubborn spots on solid brass | Less than 2 minutes of contact | Too aggressive for lacquered or plated pieces |
For a baking soda paste, I mix roughly 2 tablespoons of baking soda with just enough water to form a toothpaste-like texture, apply it with a cloth, work it gently for a minute or two, and rinse it off right away. For lemon and salt, I keep the contact short and use it only on pieces I know can handle a brighter finish. On intricate hardware, I use a cotton swab or a soft toothbrush to reach corners without grinding paste into the grain of the metal.
With any acid-based method, I watch the clock. A short pass is usually enough; leaving the mixture on brass while I answer email is how people end up with dull spots, streaking, or a finish that looks cleaner but less rich. Once the tarnish lifts, I rinse, dry, and buff before moving on. That keeps the metal bright without taking unnecessary material off the surface.
Match the method to the object in front of you
Different brass items live different lives. A door handle gets skin oil every day, a lamp base mostly collects dust, and an antique tray may have a finish you should preserve instead of erase. When I tailor the method to the object, I get better results with less risk.
Cabinet hardware and door handles
For pulls, knobs, and handles, I remove the hardware if it is easy to do so, especially during a renovation or cabinet refresh. That lets me clean evenly and keeps soap or polish off painted doors, stone countertops, and wood finishes. If I take hardware off, I label the screws in a small bag so reinstallation is quick. On high-touch kitchen pieces, I focus more on removal of grease and fingerprints than on mirror shine, because a soft, even finish usually looks better in daily use.
Lamps, trays, and decorative pieces
These are usually simpler because I can reach every side. I unplug lamps before cleaning, and I always work on a towel so I do not scratch a tabletop. For carved or pierced decor, I prefer a cotton swab for the tight spots and a microfiber cloth for the open areas. This is the kind of brass that rewards patience: a careful clean often brings back more depth than aggressive polishing ever does.
Read Also: New Renovation Smell - Stop Off-Gassing & Breathe Easy
Antiques and brass-plated items
This is where restraint matters most. If the piece is collectible, vintage, or brass-plated, I clean dirt first and then stop and assess whether more work is actually worth the risk. A magnet that sticks usually means plating, and plating can be thin enough that over-polishing exposes the base metal underneath. If I want to preserve value or original character, I would rather leave some patina than remove the surface entirely.
Knowing which object I have helps prevent the common mistakes that cause permanent damage, and that is the next thing I pay attention to.
Avoid the mistakes that cause permanent damage
- Using steel wool or abrasive pads. They scratch finishes quickly, especially on plated or lacquered brass.
- Leaving acids in place. Vinegar, lemon, and salt should be brief contact cleaners, not overnight treatments.
- Skipping the dry step. Water spots return fast, and moisture speeds fresh oxidation.
- Using ammonia, bleach, or harsh degreasers. They are too aggressive for most brass surfaces unless a manufacturer specifically allows them.
- Polishing every brass item the same way. A collector’s lamp, a kitchen pull, and an outdoor fixture do not want the same treatment.
- Ignoring nearby surfaces. Cleaners can stain marble, dull paint, or mark unfinished wood if they run.
If a piece is already flaking, pitted, or peeling at the edges, I stop before I make the damage larger. At that point, restraint is usually smarter than another round of scrubbing, and that leads naturally into a maintenance routine that keeps brass out of trouble in the first place.
A low-effort maintenance rhythm keeps brass from becoming a project
What works best for me is a small, repeatable rhythm instead of a big yearly rescue. On touched pieces, I dust weekly and wipe every 2 to 4 weeks; on decorative objects, a quick clean every 2 to 3 months is usually enough. I only polish when the metal has clearly dulled, because over-polishing is what turns a nice finish into a tired one.
- Wipe high-touch hardware with a dry microfiber cloth every week.
- Use mild soap and water when fingerprints or kitchen film build up.
- Dry immediately after any wet cleaning so spots do not return.
- Apply a thin metal-safe wax on unlacquered decorative brass only if you want extra protection between cleanings.
- Call in a restorer if the lacquer is peeling, the plating is thin, or the piece has value you do not want to gamble with.
For most homes, that is enough to keep brass looking intentional, warm, and well cared for rather than shiny for a week and damaged for a year.