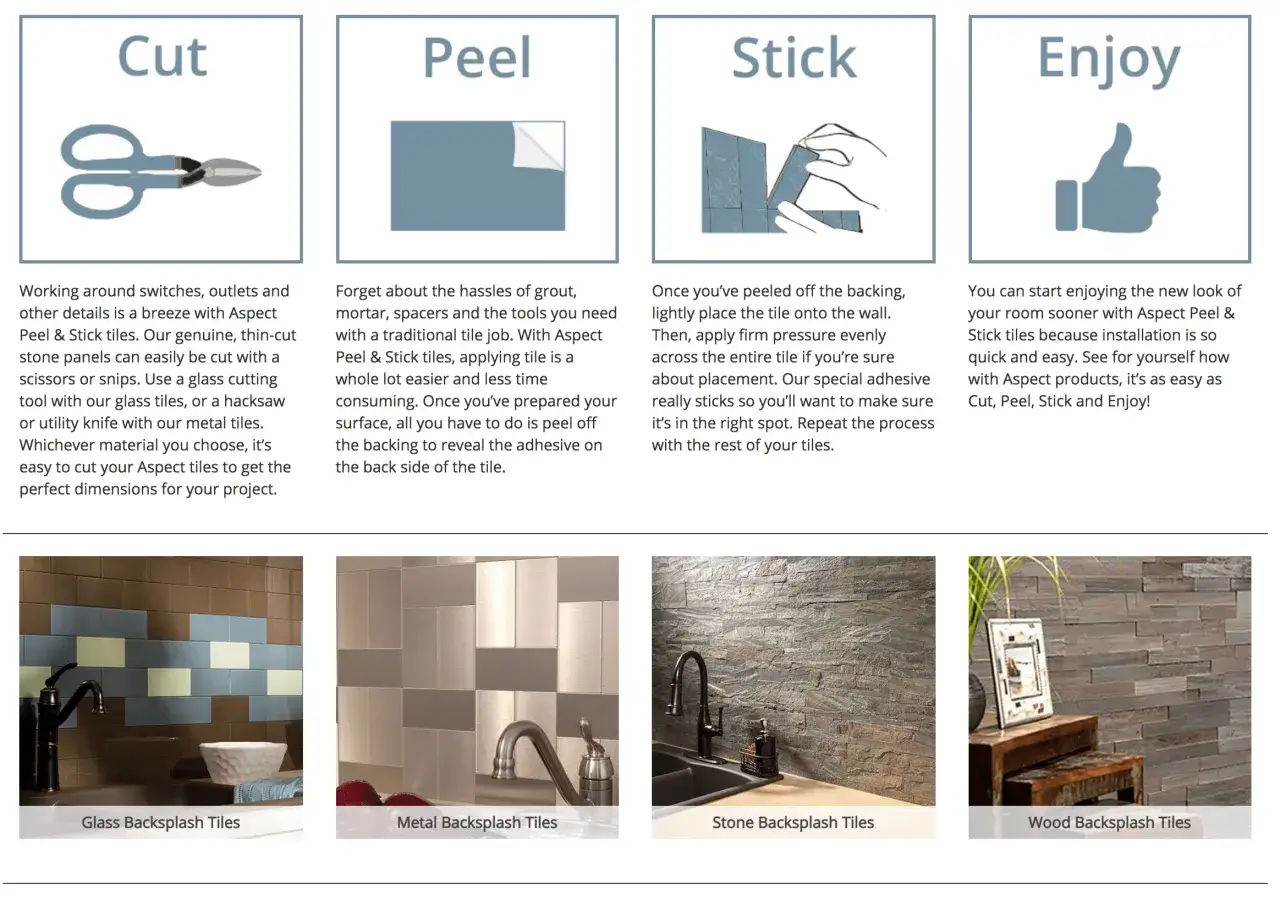
Peel-and-stick tile can cover existing tile, but only when the surface underneath is flat, firmly bonded, and free of anything that weakens adhesion. I treat it as a smart refresh for good tile, not a shortcut for damaged tile. In this guide, I cover when the method works, what prep matters most, where it tends to fail, and what I would choose instead if the base is too rough or too wet.
The quick rule is simple: good tile can stay, bad tile should come out
- Yes, overlay can work if the old tile is sound, clean, and smooth enough for full contact.
- Glossy ceramic and porcelain are usually the easiest existing surfaces to cover.
- Loose, cracked, textured, or waxed tile is a poor base and usually needs repair or removal.
- Backsplashes are easier than floors because they deal with less wear and less movement.
- Prep does most of the work: degrease, level, dry, and press the new tile properly.
- Shower and steam zones are risky unless the exact product is approved for those conditions.
The shortcut works only when the surface is already doing its job
The practical answer is yes: peel-and-stick tile can go over tile in some situations. I am comfortable with it when the existing tile is stable, the joints are not too deep, and the new product is designed for a clean, nonporous base. That is especially true for a backsplash or another low-stress wall surface.
Where people get into trouble is treating this like a disguise for a problem substrate. If the old tile moves, rocks, cracks, or has a coating that blocks adhesion, the new layer usually inherits the same problems. In other words, the finish changes, but the underlying behavior does not.
That is why the real question is less “can it be done?” and more “is this particular tile a good base?” That leads directly to the surface check I use before I open a box.
What the existing tile has to look like
I look for three things first: bond, flatness, and cleanliness. If any one of them is weak, I slow down and fix the base before I think about installing anything new. A sample tile should sit flat without rocking; if it tips, the surface is already telling you no.
| Existing surface | My verdict | Why it matters |
|---|---|---|
| Glazed ceramic or porcelain tile in good condition | Usually yes | It is hard, stable, and nonporous enough for many peel-and-stick products. |
| Tile with shallow, even grout lines | Sometimes yes | Thin grout lines are less likely to telegraph through the new layer. |
| Deep grout lines or noticeable lippage | Risky | Lippage is when one tile edge sits higher than the next, and self-stick tile will often mirror that unevenness. |
| Cracked, hollow, or loose tile | No | Movement breaks the bond, even if the surface looks fine at first. |
| Heavily textured stone or rough mosaic | Usually no | The adhesive cannot make full contact across the highs and lows. |
| Waxed, sealed, or painted tile | Usually no until stripped | Any coating between the old tile and the adhesive can cause failure. |
| Shower walls or steam areas | Usually no | Constant moisture and thermal stress are hard on self-adhesive products. |
When the answer lands in the middle, I do not guess. I either level the surface properly or choose a different material altogether. That is the cleaner decision, and it leads into prep because prep is where most successful overlays are won.
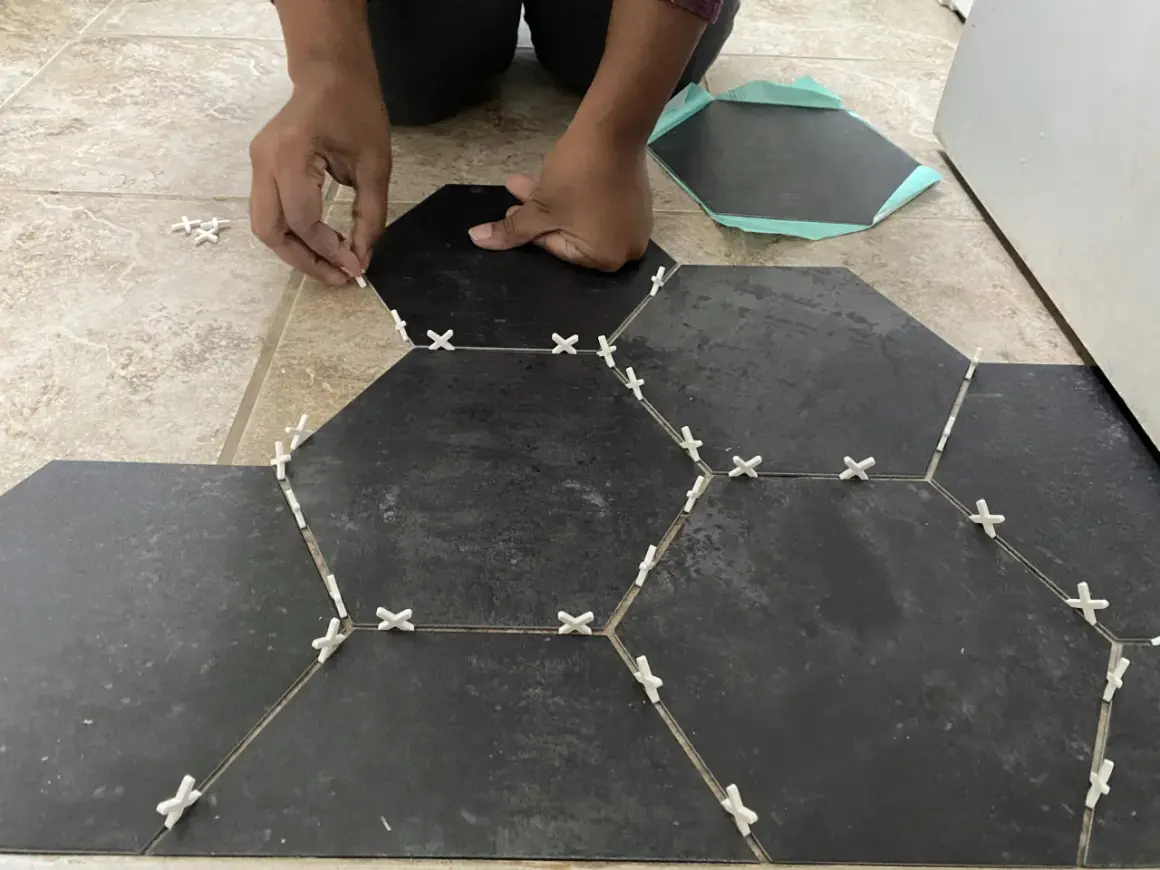
How I prep the old tile before I install anything
For a backsplash, I start by removing grease, soap film, and anything glossy on the surface. For a floor, I go further: I vacuum the grout lines, check for loose pieces, and look for hollow spots that would signal poor bonding underneath. If the tile is slick, I follow the product instructions for scuffing or priming because a shiny finish is not the same thing as a reliable bonding surface.
- Clean the tile thoroughly with a degreasing cleaner.
- Remove wax, polish, soap residue, and cooking film.
- Repair cracked or loose pieces before moving forward.
- Fill deep grout joints or chips if the new tile would bridge over them.
- Let the surface dry fully before installation.
- Use primer if the product requires it.
- Press or roll the new tile firmly so the adhesive can fully grab.
I also pay attention to room temperature. A cold basement or a damp bathroom can make self-stick products behave poorly, so I prefer to work at normal room temperature, around 65°F (18°C) or warmer. If the product sheet calls for a heavy roller, I use it; pressure is not optional with this kind of install.
Once the surface is properly prepared, the next question is where the method makes sense and where I would avoid it completely.
Where I would not use peel-and-stick over tile
I would pass on the project if the old tile is damaged, flexible, or covered in a finish I cannot remove completely. I would also avoid it in places that stay wet, get direct spray, or see repeated heat and moisture swings. Adhesive products can handle normal household use, but they are not a cure for a bad environment.
- Loose or hollow-sounding tile
- Chipped corners, cracked tiles, or missing grout
- Heavy texture that prevents full contact
- Waxed, sealed, or painted tile that cannot be cleaned back to a bare surface
- Shower surrounds and steam-heavy zones
- Any area that flexes when you step on it or press on it
My rule is blunt: if the old tile already looks like a repair project, I do not ask self-adhesive tile to rescue it. That usually leads to peeling edges and regret a few months later.
Floors and backsplashes behave very differently
This is where the project becomes more specific. A backsplash can be a straightforward cosmetic update if the tile is clean and smooth, while a floor has to survive traffic, grit, cleaning, and movement. The same adhesive that looks great on a wall can become a weak point under shoes and furniture.
| Area | How forgiving it is | What I check first |
|---|---|---|
| Kitchen backsplash | Most forgiving | Grease removal, smooth glaze, and clean edges around outlets and counters. |
| Bathroom wall behind a vanity | Usually workable | Soap residue, moisture exposure, and whether the old tile is truly nonporous. |
| Kitchen floor | Possible, but stricter | Flatness, grout depth, and how much traffic the room takes. |
| Bathroom floor | Riskier | Water exposure, flatness, and whether the existing tile is fully secure. |
| Shower or tub surround | Usually not worth it | Constant moisture, splash, and cleaning stress the bond too much. |
That is why I tend to recommend overlays more often for walls than for floors. The lower the stress on the surface, the better your odds of getting a clean, long-lasting result.
The mistakes that usually cause failure
Most bad installs fail for predictable reasons, and that is useful because they are avoidable. I see the same mistakes again and again, especially in fast DIY projects where the surface gets only a superficial cleaning.
- Skipping degreasing and leaving behind soap scum, wax, or cooking residue.
- Ignoring grout depth and expecting the tile to bridge over uneven joints.
- Installing over sealers or paint and hoping the adhesive will hold anyway.
- Adding extra glue even when the product says not to.
- Working in a cold or damp room that weakens the bond during install.
- Not pressing firmly enough for the adhesive to fully contact the surface.
- Covering damaged tile instead of fixing the actual problem underneath.
The biggest mistake is optimism. Adhesive can improve a good base, but it cannot turn a bad one into a stable substrate. Once you accept that, the rest of the decision gets much easier.
What I would do instead if the tile is not a good base
If the existing tile fails the bond or flatness test, I usually recommend a different path instead of forcing an overlay. Sometimes that means removing the old tile and starting fresh. Other times it means leveling the surface first and then choosing a finish that is better suited to the room’s moisture and wear.
| Option | Best for | Main tradeoff |
|---|---|---|
| Peel-and-stick over tile | Good tile in low-stress wall or light-use floor projects | Fast and simple, but only on a very sound surface. |
| Remove the old tile and reinstall | Loose, uneven, or damaged substrates | More labor and mess, but the most reliable long-term base. |
| Use a different surface system | Wet zones, heavy traffic, or textured existing tile | Usually costs more upfront, but it performs better where stress is higher. |
If the goal is a cleaner look without a full demo, I would still consider patching, leveling, or skim-coating the old tile before I blamed the material itself. A better base often matters more than a more expensive finish.
The check I make before opening the first box
Before I buy anything, I run a simple three-part test. The old tile has to be firmly bonded, the surface has to be flat enough that a sample tile does not rock, and the product instructions have to allow installation over that kind of base. If one of those fails, I stop there.
That approach keeps the project practical. It lets you use peel-and-stick tile where it makes sense, and it keeps you from layering a quick fix over a surface that is already asking for repair. If you want the best odds of success, start with the base, not the finish.