Whitewashing brick is one of the easiest ways to soften a fireplace, backsplash, or accent wall without losing the texture that makes masonry feel warm and architectural. This guide shows how to whitewash brick without flattening the character of the surface, from prep and mix ratios to application and touch-up. I’ll also cover the tradeoffs, because the best finish depends as much on the brick itself as on the paint you use.
The finish works best when the brick still shows through
- Start with clean, dry, sound brick; whitewash highlights flaws instead of hiding them.
- A 1:1 mix of flat white latex paint and water is a reliable starting point, with more water for a softer finish.
- Test on a small hidden area first, because porous brick absorbs faster than dense or previously sealed brick.
- Brush on small sections, then wipe back the excess to keep the mortar lines and texture visible.
- For a small interior project, DIY materials usually stay around $40 to $100 if you already own a few basic tools.
What whitewashing changes and when it is the right choice
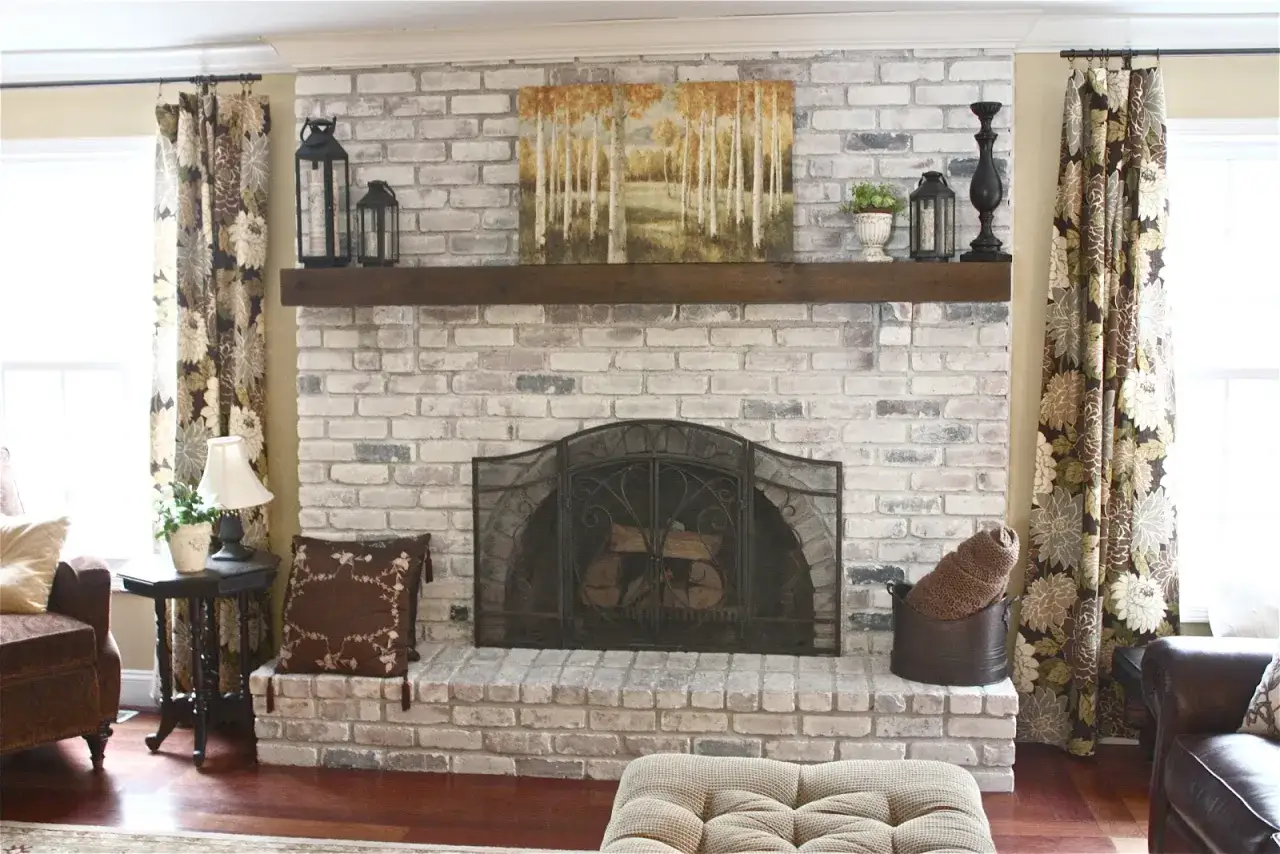
I reach for a whitewash finish when brick is visually heavy but structurally fine. It lightens the surface without hiding the texture, so the room feels softer and less dominated by the masonry. On a fireplace, that often matters more than getting a perfectly uniform white surface.
Whitewash is not the same as full paint. It is usually a diluted water-based paint finish that lets the brick color come through, at least in part. Limewash is a different material altogether: it has a chalkier, mineral look and behaves differently on the wall. Full paint gives the most solid coverage, but it also erases more of the brick character you may actually want to keep.
| Method | Look | Best use | Notes |
|---|---|---|---|
| Whitewash | Soft, semi-transparent, textured | Fireplaces, accent walls, rustic interiors | Easy to adjust by changing the dilution or wiping more aggressively |
| Limewash | Chalkier, more mineral, subtly mottled | Porous masonry and historic-looking finishes | More specific to the substrate and more technique-sensitive |
| Full paint | Solid, uniform, opaque | Big color changes or hiding uneven brick | Harder to reverse and easier to make the brick look flat |
If the brick has already been painted or sealed, I test first instead of assuming the finish will behave the same way. The less absorbent the surface, the more the wash sits on top instead of blending into the texture, and that changes the look fast. Once you know what result you want, the next step is making sure the brick can actually take the finish evenly.
Prepare the brick so the wash goes on evenly
The prep stage is where most of the quality lives. Whitewash will not hide soot, dust, loose mortar, or moisture marks; it will spotlight them. I like to think of the finish as honest, which means the surface underneath has to be ready for the camera.
- Clean the brick thoroughly. Brush off dust, cobwebs, and loose grit first, then wash away soot, smoke residue, grease, or grime with a masonry-safe cleaner.
- Repair the damage. Fix crumbling mortar joints, chips, or active cracks before you paint anything. Whitewash makes those flaws more visible, not less.
- Remove white mineral deposits. Efflorescence, the powdery salt bloom that shows up on masonry, can interfere with adhesion and create a chalky patch later.
- Let everything dry completely. I usually want at least 24 hours after a light cleaning and 48 hours or more after a deeper wash, especially outdoors.
- Mask the surrounding finishes. Use painter’s tape, plastic, and a drop cloth around trim, mantels, floors, and adjacent walls.
For fireplaces, I also stay strict about heat exposure. I whitewash the surround or face brick, not the firebox interior or any surface that gets direct flame or intense heat. Once the brick is clean and protected, the actual application becomes much easier to control.
The application method that gives the cleanest control
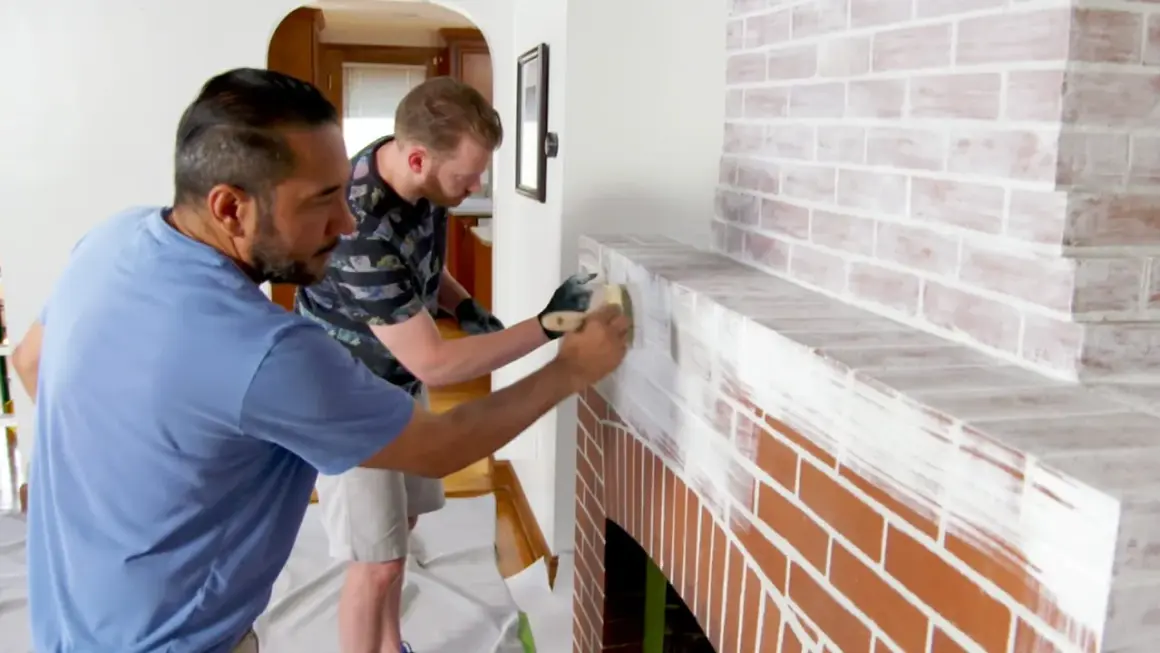
I prefer a simple brush-and-wipe approach because it gives the most control over texture. The goal is not to paint the brick solid white; the goal is to let the surface stay readable while softening the color.
- Mix the wash. Start with equal parts flat white latex paint and water. If you want a softer, more translucent result, thin it further to 1 part paint to 2 parts water. Stir until the mix looks milky and smooth, not streaky.
- Test before committing. Brush the mix on a small hidden spot or a few bricks and let it dry. Wet whitewash always looks darker than the final result.
- Work in small sections. I usually do 2 to 4 square feet at a time so I can keep the finish consistent before it starts to set.
- Brush into the joints and texture. A 2- to 3-inch brush or masonry brush helps the wash sink into the mortar lines and rough face of the brick.
- Wipe back the excess. Use a rag or sponge while the wash is still wet. Press harder for more brick visibility; wipe more lightly if you want a heavier finish.
- Add a second thin coat only if needed. Once the first coat dries, step back and decide whether the room needs a little more coverage. A second light pass is safer than trying to make the first coat do everything.
A small fireplace surround can usually be handled in one afternoon, but a full accent wall is better done in stages. The more wall you cover, the more important it becomes to keep the mix, wiping pressure, and pace consistent. That variation is not a flaw; it is the main design control you have.
How to steer the finish from airy to opaque
Opacity is the real decision in this project. A soft whitewash can brighten a room while still showing the brick’s warmth, but too much coverage turns the surface into a flat painted wall. I usually stop earlier than beginners expect, because the room often looks better when the brick still has some depth.
| Look you want | Mix and method | When it works best |
|---|---|---|
| Barely there | Use a thinner mix and wipe back quickly | When the brick already has a strong color or the room needs more warmth than brightness |
| Classic soft white | Start around 1:1 and wipe most of it back | For most fireplaces and interior feature walls |
| Heavier aged look | Apply two thin coats and leave more wash on the surface | For rustic kitchens, older homes, or very textured brick |
I also think about the room around the brick. A cool, bright white can feel sharp next to red-orange brick, while an off-white or warm white usually sits better with wood, brass, linen, and other home furnishings. If the wall is part of a lived-in room, that softer tone often looks more intentional than a stark white finish. Once the color balance is right, the next risk is not the design choice but the mistakes that make the surface look rushed.
Mistakes that make whitewashed brick look patchy or fake
The bad versions are easy to spot: streaky brick, muddy mortar lines, or a surface that looks painted from across the room but unfinished up close. Most of those problems come from a few preventable errors.
| Mistake | What it causes | What I would do instead |
|---|---|---|
| Skipping the test patch | Unexpected absorption and color shift | Test on a hidden area or a few bricks and let it dry fully |
| Applying to damp brick | Blotchy coverage and weak adhesion | Wait until the brick is fully dry after cleaning or rain |
| Using glossy paint | A plasticky sheen that fights the texture | Choose flat or matte paint for a softer finish |
| Over-wiping mortar lines | The wall loses depth and starts to look flat | Brush the wash into the joints first, then wipe back carefully |
| Ignoring soot or efflorescence | Streaks, haze, or uneven bonding | Clean and stabilize the masonry before the first coat |
| Rushing the second coat | Lap marks and muddy spots | Let the first layer dry and judge it in daylight before adding more |
When a finish goes wrong, I resist the urge to keep fixing it while it is half dry. That is usually how lap marks and cloudy edges happen. It is better to let it dry, step back, and then make one controlled adjustment than to keep chasing a problem that is still changing in front of you. Once those traps are out of the way, the last question is whether this is still a DIY job or one worth paying for.
Budget, drying time, and when I would hire help
The DIY math is usually friendly. A small fireplace surround may only need a quart of paint, a bucket, tape, a brush, and a few rags, which keeps materials around $40 to $100 if you already own a few basics. A larger wall or exterior section can land closer to $100 to $250 once you add cleaners, drop cloths, and minor repair supplies.
| Project | DIY budget | Typical time | When a pro makes more sense |
|---|---|---|---|
| Small fireplace surround | $40 to $100 | Half a day plus drying time | If the masonry needs repair or the area gets heavy soot exposure |
| Large interior wall | $100 to $250 | One to two days with prep and touch-ups | If you want a very even finish across a big visible surface |
| Exterior brick | $150 to $400+ for materials | One to three days, weather dependent | If access, height, or moisture problems are part of the job |
For context, professional fireplace painting estimates in 2026 are around $500 on average, while full exterior brick projects can climb into the thousands once labor and access are included. I would bring in help when the brick has active water intrusion, failing mortar, or hard-to-reach exterior sections that require ladders or scaffolding. Drying time is usually overnight for a light interior project, but I still wait at least 24 hours before deciding on a second coat and longer before any heavy cleaning. If those numbers fit the project, the finish is probably a good DIY candidate; if they do not, a pro estimate is the next logical check.
The cleanest result is the one that stays believable
The best whitewashed brick keeps the masonry readable. You should still see the pits, mortar lines, and natural variation that made the brick worth keeping in the first place.
- Keep a small test board or spare brick so you can save the mix ratio that worked.
- Label leftover wash with the dilution you used if you want easy touch-ups later.
- Clean with a soft brush and mild soap only; harsh acids can strip or dull the finish.
- Add another thin coat later if the room needs more brightness instead of trying to undo an overbuilt finish.
That is the version I trust: soft, lived-in, and easy to maintain without pretending the brick is something else. If you keep the mix thin, the prep honest, and the wiping controlled, the result feels like part of the architecture, not a coating sitting on top of it.